As you know with virsh (or virt-manager), it’s not possible create snapshot with LVM in RAW format but just QCOW2 format. So why not use LVM snapshot directly cause it can do it well and then create an other hard-drive in your VM guest linked to the LVM snapshot.
Begin to stop your virtual machine, then check free space of your volume group and logical volume:
# vgs
 VG      #PV #LV #SN Attr   VSize   VFree
 vg_data   1   8   1 wz--n- 931.51g 50.51g
create your snapshot:
lvcreate -L1G -s -n vmdebian_snap /dev/mapper/vg_data-debian
check it:
# lvs
 LV            VG      Attr       LSize   Pool Origin Data%  Meta%  Move Log Cpy%Sync Convert
 Data          vg_data -wi-ao---- 800.00g
 centos        vg_data -wi-a-----  10.00g
 debian        vg_data owi-aos---  10.00g
 freebsd       vg_data -wi-a-----  10.00g
 macasox       vg_data -wi-a-----  10.00g
 vmdebian_snap vg_data swi-aos---   1.00g      debian 19.36
 vmshare       vg_data -wi-a-----  10.00g
 winseven      vg_data -wi-a-----  30.00g
You can see the link between the snapshot “vmdebian_snap” and the orginal logical volume “debian”
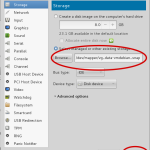
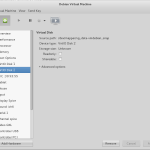
Now, it’s the time to go to virt-manger, and create another disk linked to this new logical volume “vmdebian_snap” by click on “Add hardware” button in details window of your virtual machine:
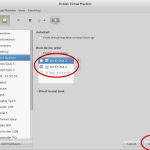
Then, change the boot order, of course:
Before to continue, I must say that I use macvlan for my network as it describe here and when your virtual machine start, even if it start on the right “snapshot” disk, the network interface eth0 is recognize, it can’t reach my outside dhcp server! 🙁
After many research, I found out why: It’s a bug of virsh: It doesn’t start the network if the virtual machine boot on the 2nd disk. Let’s change this but not with virt-manger but with virsh (more powerful):
As root, first stop your virtual machine and list them:
virsh list --all
Then edit the virtual machine to make the change:
virsh edit Debian
and change the two lines which contains the reference of disk: vda to vdb and vdb to vda:
<devices>
    <emulator>/usr/bin/kvm</emulator>
    <disk type='block' device='disk'>
      <driver name='qemu' type='raw' cache='none' io='native'/>
      <source dev='/dev/mapper/vg_data-debian'/>
      <target dev='vdb' bus='virtio'/>   <<<<<<<<<< HERE
      <boot order='1'/>
      <address type='pci' domain='0x0000' bus='0x00' slot='0x07' function='0x0'/>
    </disk>
    <disk type='block' device='disk'>
      <driver name='qemu' type='raw' cache='none' io='native'/>
      <source dev='/dev/mapper/vg_data-vmdebian_snap'/>
      <target dev='vda' bus='virtio'/>   <<<<<<<<<< AND HERE
      <address type='pci' domain='0x0000' bus='0x00' slot='0x09' function='0x0'/>
    </disk>
    ...
to save (if you use nano as editor), use <ctrl>+x
Start it. It’s work! 🙂
Now, you can use all LVM features (create, snapshot, merge…) with your virtual machine under libvirt as it do with QCOW2!
that’s all folks 😉


